现在开始
🚨 注意
在开始使用之前,您应该了解以下约定:
- Vine 只支持 Vue 3.0+。
- 我们提供了对 Vite 和 Rspack 的支持。
- Vine 仅支持 TypeScript,JavaScript 用户无法使用完整功能。
欢迎加入用另一种方式编写 Vue 的探索旅程!
首先请在你的项目中安装 Vue Vine 
pnpm i vue-vineVine 提供了构建工具集成(Vite 插件和 Rspack loader)以及 VSCode 扩展来支持基础功能。
除此之外,我们还提供了其他一些开发或配置时可能会需要用到的库,你可以在下一节 周边生态 中了解更多细节。
安装 Vite 插件
在 vite.config.ts 中导入插件:
import { VineVitePlugin } from 'vue-vine/vite'

export default defineConfig({
  plugins: [
    // ...其他插件
    VineVitePlugin()
  ],
})
安装 Rsbuild 插件
在 rsbuild.config.ts 中使用插件:
import { defineConfig } from '@rsbuild/core'
import { pluginVueVine } from 'vue-vine/rsbuild'

export default defineConfig({
  plugins: [
    pluginVueVine({
      // 可选的编译器选项
      // compilerOptions: { ... }
    })
  ],
})
为什么使用插件?
Rsbuild 插件相比 Rspack loader 提供了更简单、更高层次的集成方式。它会自动:
- 配置
.vine.ts文件所需的 loader - 设置样式处理规则
- 通过 DefinePlugin 注入 Vue 运行时标志
对于需要细粒度控制 loader 配置的高级用户,仍可以直接使用 Rspack loader(见下一节)。
安装 Rspack loader(高级用法)
安装 Rspack loader:
pnpm add -D @vue-vine/rspack-loader@beta在 rspack.config.ts 中配置 loader:
import { defineConfig } from '@rspack/cli'
import { rspack } from '@rspack/core'

// 目标浏览器配置,用于代码转译
const targets = ['last 2 versions', '> 0.2%', 'not dead']

export default defineConfig({
  module: {
    rules: [
      // 使用链式 loader 处理 .vine.ts 文件
      // Loader 从右到左(从下到上)执行:
      // 1. @vue-vine/rspack-loader:将 Vine 组件转换为 TypeScript
      // 2. builtin:swc-loader:将 TypeScript 转换为 JavaScript
      {
        test: /\.vine\.ts$/,
        resourceQuery: { not: [/vine-style/] }, // 排除样式虚拟模块
        use: [
          {
            loader: 'builtin:swc-loader',
            options: {
              jsc: {
                parser: { syntax: 'typescript' },
              },
              env: { targets },
            },
          },
          {
            loader: '@vue-vine/rspack-loader',
          },
        ],
      },
      // 处理 Vine 样式虚拟模块
      {
        resourceQuery: /vine-style/,
        use: [
          {
            loader: '@vue-vine/rspack-loader/style-loader',
          },
        ],
        type: 'css',
      },
      // ...其他 rules
    ],
  },
  plugins: [
    // Vue 运行时所需
    new rspack.DefinePlugin({
      __VUE_OPTIONS_API__: JSON.stringify(true),
      __VUE_PROD_DEVTOOLS__: JSON.stringify(false),
      __VUE_PROD_HYDRATION_MISMATCH_DETAILS__: JSON.stringify(false),
    }),
  ],
})
为什么需要链式 loader?
Vine 编译器输出的是 TypeScript 代码,需要转换为 JavaScript。Rspack 内置的 builtin:swc-loader 用于进行 TypeScript 到 JavaScript 的转换,通过 Rust 原生实现提供了卓越的性能。
resourceQuery: { not: [/vine-style/] } 确保 Vine 样式块中的 CSS 内容不会被 TypeScript/JavaScript loader 处理。
通过项目脚手架创建项目
你可以渐进式地将 Vue Vine 集成到现有的 Vue 3 项目中,但如果你想要启动一个新项目,放弃 SFC,只想使用 Vue Vine,我们也为你提供了一个创建项目模板的脚手架工具。
运行以下命令来创建一个新项目:
# 你没有全局安装 CLI 的话
pnpx create-vue-vine my-vine-project

# 你已经全局安装 CLI 的话
create-vue-vine my-vine-project或者:也可以选择全局安装 CLI
pnpm i -g create-vue-vine点击这里预览运行 CLI 后的后续操作
> pnpx create-vue-vine my-vine-project
...
┌ Vue Vine - Another style of writing Vue components
│
◇ Use Vue Router?
│ Yes
│
◇ Use Pinia as state management?
│ Yes
│
◇ Using atomized css?
│ - UnoCSS
│ - Tailwind
│ - No
│
◇ Install all dependencies for the project now?
│ Yes
│
◇ Project created at: /path/to/my-vine-project
│
...
◇ Dependencies installed!
│
└ You're all set! Now run:
cd my-vine-project
pnpm dev
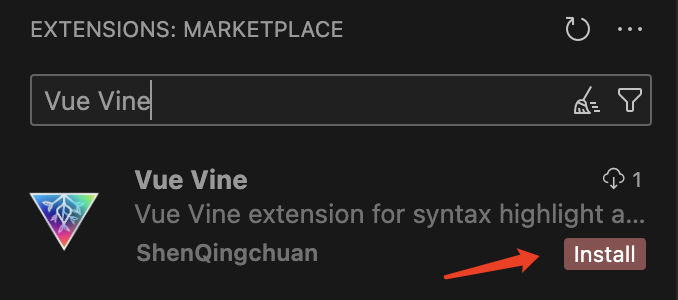
Happy hacking!安装 VSCode 扩展
在市场中搜索 "Vue Vine" 并安装。
使用 macro 类型
Vine 提供了一个 typescript 声明文件,以帮助你使用宏时获得智能提示。
{
  "compilerOptions": {
    "types": ["vue-vine/macros"]
  }
}
下一步
现在你已经成功安装了 Vue Vine,以下是一些推荐的后续步骤: