Get started
🚨 WARNING
Before starting to use it, you're supposed to know the following conventions:
- Vine was designed to only support Vue 3.0+.
- It provides official support for Vite and Rspack.
- Vine is designed to support only TypeScript, JavaScript-only users can't harness the complete range of functionalities.
Welcome to join us to exploring another style of writing Vue!
Install Vue Vine 
pnpm i vue-vineVine provides build tool integrations (Vite plugin and Rspack loader) and a VSCode extension to offer feature support.
Besides, we also provide some other libraries that you might need during development or configuration, you can learn more details in the next section Ecosystem.
Install Vite plugin
Use the plugin in vite.config.ts:
import { VineVitePlugin } from 'vue-vine/vite'

export default defineConfig({
  plugins: [
    // ...Other plugins
    VineVitePlugin()
  ],
})
Install Rsbuild plugin
🧪 Beta Feature
Rsbuild support is currently in beta.
Please install the beta version and report any issues you encounter.
Use the plugin in rsbuild.config.ts:
import { defineConfig } from '@rsbuild/core'
import { pluginVueVine } from 'vue-vine/rsbuild'

export default defineConfig({
  plugins: [
    pluginVueVine({
      // Optional compiler options
      // compilerOptions: { ... }
    })
  ],
})
Why use the plugin?
The Rsbuild plugin provides a simpler, higher-level integration compared to the Rspack loader. It automatically:
- Configures the necessary loaders for
.vine.tsfiles - Sets up style processing rules
- Injects Vue runtime flags via DefinePlugin
For advanced users who need fine-grained control over loader configuration, you can still use the Rspack loader directly (see next section).
Install Rspack loader (Advanced)
🧪 Beta Feature
Rspack support is currently in beta.
Please install the beta version and report any issues you encounter.
Install the Rspack loader:
pnpm add -D @vue-vine/rspack-loader@betaConfigure the loader in rspack.config.ts:
import { defineConfig } from '@rspack/cli'
import { rspack } from '@rspack/core'

// Target browsers for transpilation
const targets = ['last 2 versions', '> 0.2%', 'not dead']

export default defineConfig({
  module: {
    rules: [
      // Process .vine.ts files with chained loaders
      // Loaders execute from right to left (bottom to top):
      // 1. @vue-vine/rspack-loader: Transforms Vine components to TypeScript
      // 2. builtin:swc-loader: Transforms TypeScript to JavaScript
      {
        test: /\.vine\.ts$/,
        resourceQuery: { not: [/vine-style/] }, // Exclude style virtual modules
        use: [
          {
            loader: 'builtin:swc-loader',
            options: {
              jsc: {
                parser: { syntax: 'typescript' },
              },
              env: { targets },
            },
          },
          {
            loader: '@vue-vine/rspack-loader',
          },
        ],
      },
      // Process Vine style virtual modules
      {
        resourceQuery: /vine-style/,
        use: [
          {
            loader: '@vue-vine/rspack-loader/style-loader',
          },
        ],
        type: 'css',
      },
      // ...other rules
    ],
  },
  plugins: [
    // Required for Vue runtime
    new rspack.DefinePlugin({
      __VUE_OPTIONS_API__: JSON.stringify(true),
      __VUE_PROD_DEVTOOLS__: JSON.stringify(false),
      __VUE_PROD_HYDRATION_MISMATCH_DETAILS__: JSON.stringify(false),
    }),
  ],
})
Why chained loaders?
The Vine compiler outputs TypeScript code that needs to be transformed to JavaScript. Rspack's built-in builtin:swc-loader is used for this TypeScript-to-JavaScript transformation, providing excellent performance through native Rust implementation.
The resourceQuery: { not: [/vine-style/] } ensures that CSS content from Vine style blocks isn't processed by the TypeScript/JavaScript loaders.
Create project with CLI
You can gradually integrate Vue Vine into an existing Vue 3 project, but if you want to start a new project, give up SFC, and only use Vue Vine, we also provide a project template for you.
Run the following command to create a new project:
pnpx create-vue-vine my-vine-projectAnother way: You can also choose to install the CLI globally
pnpm i -g create-vue-vineClick here to preview the subsequent operations after running the CLI
> pnpx create-vue-vine my-vine-project

...

┌  Vue Vine - Another style of writing Vue components
│
◇  Use Vue Router?
│  Yes
│
◇  Use Pinia as state management?
│  Yes
│
◇  Using atomized css?
│  - UnoCSS
│  - Tailwind
│  - No
│
◇  Install all dependencies for the project now?
│  Yes
│
◇  Project created at: /path/to/my-vine-project
│

...

◇  Dependencies installed!
│
└  You're all set! Now run:

   cd my-vine-project
   pnpm dev

   Happy hacking!
Install VSCode extension
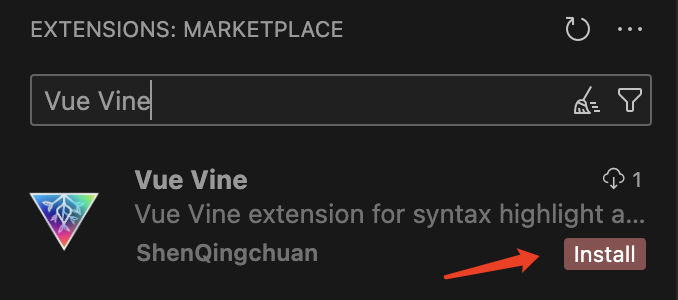
Search "Vue Vine" in the marketplace and install it.
Use macro types
Vine provides a typescript declaration file to help you write macros with intellisense.
{
  "compilerOptions": {
    "types": ["vue-vine/macros"]
  }
}
Next steps
Now that you've set up Vue Vine, here are some recommended next steps:
- Learn the fundamentals: Read the Specification to understand Vine's core concepts and syntax
- Explore macros: Check out the Macros guide to learn about
vineProp,vineEmits,vineSlots, and more - State management: Discover Vibe, Vine's state management solution for cross-component data sharing
- Check out examples: Visit our GitHub repository to see real-world examples